I like to brew wine; It's only a hobby but I'm obsessed!
This is the place to be if you want to see what another brewer is up to or want some encouragement to start or diversify. I've posted heaps of recipes (clicky) and 2 wine-making vids (here for wine made from cartons of juice blog / youtube, and here for Blackberry wine on the pulp blog / youtube).
If you're new here then do explore, take this link for tips about where to find what you're interested in.


Tuesday, 25 September 2012

Recipe; Blackberry & Elderberry Wine

I've been bad again with updating my blog, but thanks to a blog follower (hi Rachel) i've been booted up the backside and i'm updating it now. The bad news is that i only have one recipe to add, so i'm not too bad after-all.

This year's blackberry wine has a small proportion of elderberries in it, so it won't be exactly the same as others i've made in the past. The good news is that they always keep on turning out good. As a rule of thumb the more elderberries you add the longer you'll need to wait for the wine to condition. Pure elderberry may take 3 years to be drinkable and keep improving for years beyond that. It is delicious but if you can;t wait that long then use less elderberries and more blackberries. Pure blackberries may be ready in less than 6 months.

Here's some previous recipes
2011 Blackberry & Elderberry. 1:7 (elderberry:blackberry ratio)
2010 Just Blackberry (GV1 yeast)
2010 Just Blackberry (Sauternes yeast)
2009 Blackberry & Elderberry (1:14)
2009 Blackberry & Elderberry (1:1)
2nd run on pulp of above

This year's wine is about 1:4 ratio

Ingredients (4 gallons)

  • 5.7 kg Blackberries
  • 1.45 kg Elderberries
  • 4 kg sugar (white, can, fair-trade)
  • 4 Teaspoons Pectolase
  • 4 Teaspoons nutrient (tronozymol)
  • 2.5 Teaspoons Tartaric acid
  • 2 Teaspoons Citric acid
  • 3 Campden tablets, crushed
  • Yeast GV1

OG 1079

Method

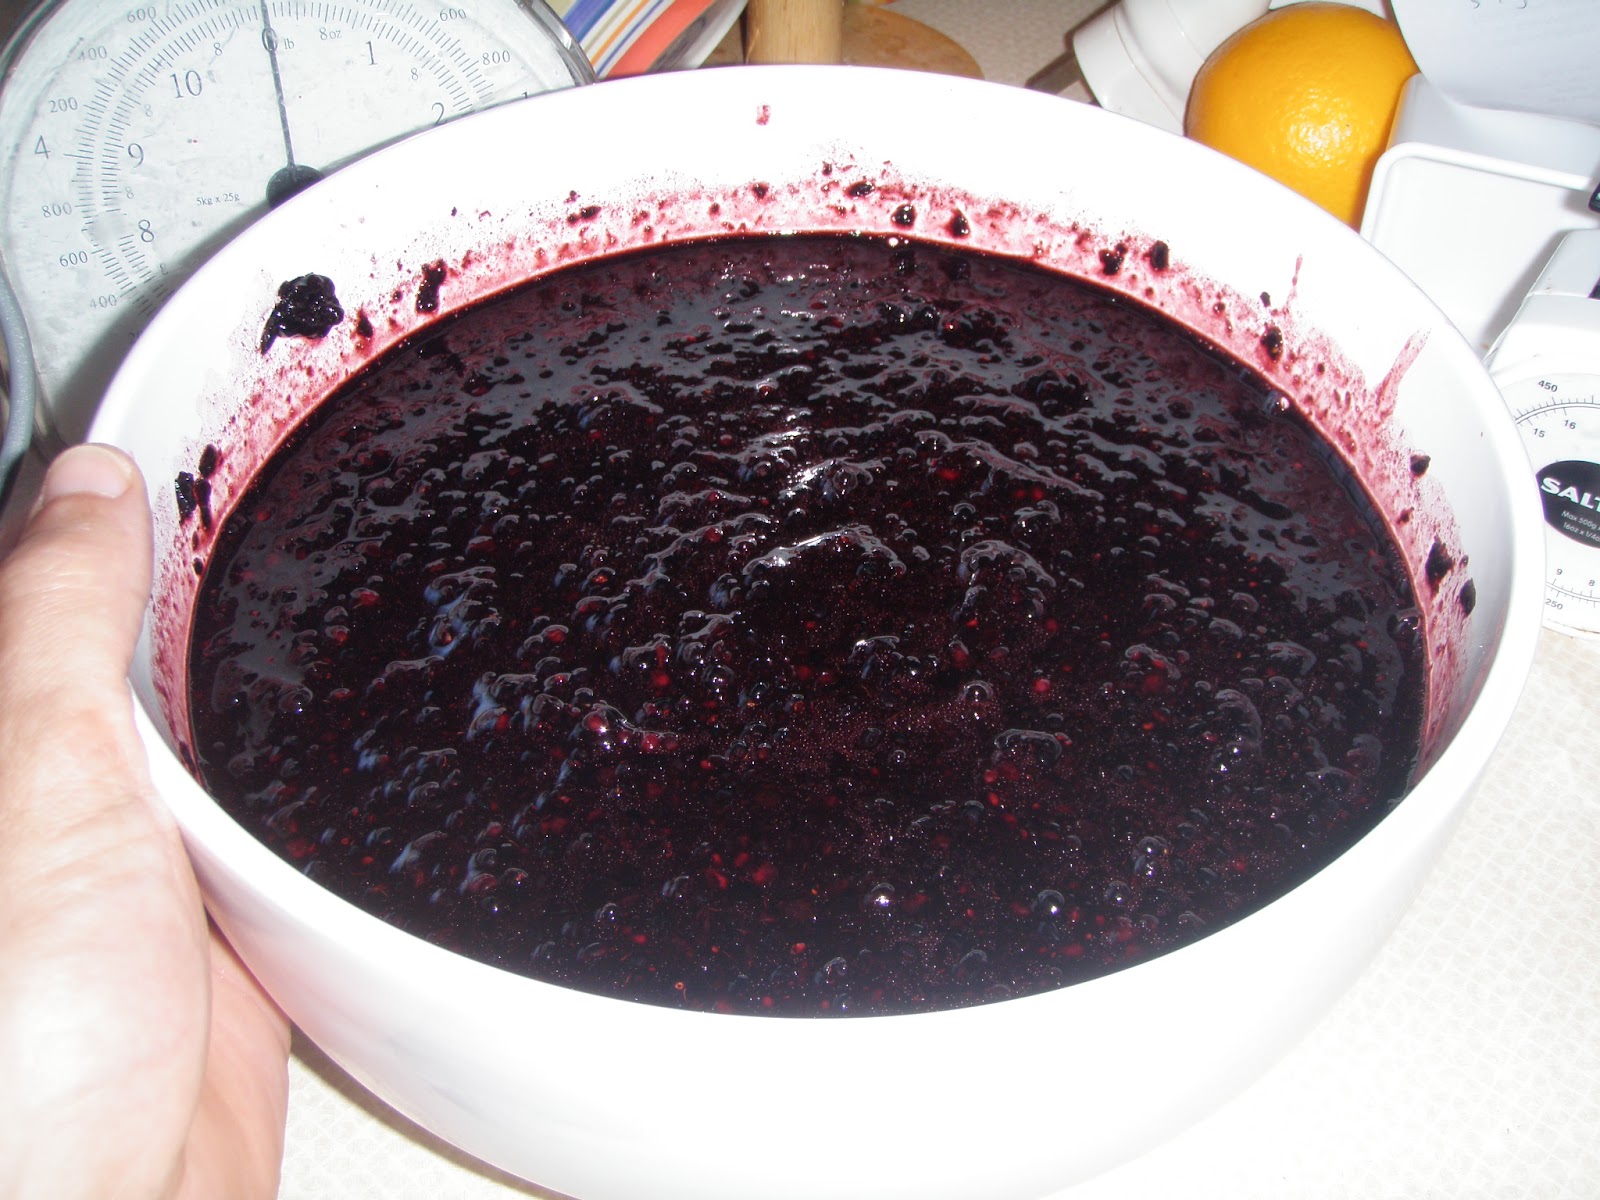
I collected my blackberries over a number of days, washed and froze them. When I had enough to make a good sized batch of wine then I collected the elderberries and then I got cracking. I was aiming for something like 1/3rd to 1/5th elderberries by weight and I got around 1/4 so that worked out neat. And so some piccies have fresh fruit in them, and some mashed, and some frozen. Here comes the gratuitous piccie section!

A whole heap of frozen blackberries in the primary fermentation bin.

A heap of fresh blackberries washed and ready to mash.

The blackberries above, but mashed (told you they were gratuitous piccies)

Elderberries, stripped from sprays with a fork, ready for mashing.

I chucked the frozen fruit into the fermenting bin, mashed the fresh fruit and added that to the bin. Put the sugar in a large saucepan, added plenty of water, brought it to the boil and then added it to the fermenting bin containing the berries. The hot water was enough to defrost the berries in minutes. So while that was happening I cracked on with the rest.

So that meant putting the crushed campden tablets into the bin, and the pectolase too, and then washing up the mess in the kitchen (take care with mashing those berries, it's a messy splashy business). After a while the frozen berries defrosted, so I got the masher out again and got stuck in. It takes time but the more mashing you do the better it'll be. At the very least you'll get a more accurate gravity reading. You can expect 10 minutes of non-stop focused action, longer if you're dawdling. I made the volume up to about 4.5 gallons with water. stirred. Then put the lid on and left it overnight.

First of all I took some liquid out of the fermenting bin and measured the gravity. I was happy with it, 1079, so didn't add anymore sugar or water. Next day I added the acids, nutrient and yeast and gave the lot a very sloshy stir and used a whisk too. This gets lots of air into the must which is good because yeast needs oxygen to breed (bud) and that speeds up the formation of a healthy sized colony, which rips into the fermentation pronto. And I put the lid on again. I used GV1 (Gervin number 1) yeast because last years wine turned out fine with it. It's a quick starter and settles well. Kind of general purpose but also low foaming so no messy froth spilling out of bins etc and getting you into trouble!

Each day, for the next few days, I gave the wine a sloshy stir. Same reason as before, to get lots of air into the mix. And then covered the bin again. I should have then moved the must to secondary fermentation under airlock, but life got in the way and this didn't happen until about 10 days after starting the brew. So I also removed the fruit at the same time. Messy job, pouring through a colander and then a sieve. About 8 days later the ferment had stopped and I racked the wine into single gallon demijohns. It was just short of 4 gallons so I had to top up a little with water, about 1 pint altogether.

Now I'm in the process of waiting for it to clear or at least throw a sediment. Nothing to do but wait. When it does I'll rack it again, degas it, stabilise etc. I'll bottle it when I want to drink it, but not before as conditioning happens better in bulk. I could have (perhaps should have) degassed and stabilised already. it'll help the wine to clear, but i'm not in a hurry.

Discussion

Pectolase will help to extract juice from the fruit, it breaks down pectin.

Campden tablets will stun any wild yeasts. I believe it also leads to the production of small amount of glycerol, which is thought to be desirable. And I also believe that the SO2 released from the campden tablets assists in extracting phenols from the skins. This does two things, adds astringency to the wine, and flavour too because the phenols go on to form esters in very small amounts. These are intensely fruity flavoured molecules. The synthetic versions are what gives pear drops their taste, also pineapple chunks etc. They are also sometimes solvents in glues! Most yeast makes esters as by products, which is one reason why it's good to choose your yeast rather than go wild. You don't know what you'll get from wild yeast and making nice fermentation side products is not a priority for a wild yeast. If you use wild yeast and like your wine then good for you, if it ain't broke and all that .... What I'm advising is a way to reduce uncertainty in the product, and especially reducing the chance of getting unlucky with wild yeast that makes gross wine. Candida is a yeast and I don't fancy using that for example!

The nutrient I'm using is a brand I've switched to. It smells strongly of B vitamins (marmite smell), which is unlike my previous brand. Apparently yeast loves B vitamins, it'll keep me happy if I keep it happy, so it gets the deluxe nutrient these days.

Acids. Acids are important for yeast, they like a certain pH level. You needn't get all technical about this, just find a tried and tested recipe (like this one) and copy it (with your personal tweaks of course). Citric acid is what gives lemon juice its flavour. That flavour works well with blackberries, but I don't want to overdo it. Tartaric acid is clean, it's in grapes, the main flavour in grapes comes from the skins (test it out next time you eat one). It won't interfere with the flavour.

Edit 22nd June 2013

Just sampled a 1/2 bottle of this wine, first time. It's delicious. It's not lacking in body but neither can it be described as light. ABV working out around 11.5% seems to suit this. It's grown up tho, astringent, dry, and acidity doesn't go unnoticed. I think it is just fine as a young wine, but actually for all the work that went into it i'm very tempted to put the other 3 gallons under the stairs and forget about them. I think this will be stunning and classy after another year. Comparable in quality to anything you'd buy for £10 a bottle or so. But mrs Critter Wines will of course be a vital part of such decisions, and if she loves it the way it is now then i'll cave in, and stash a single gallon.

I am going to make a mental note to try and get as close to this recipe as possible in future. This doesn't mean you should, it's probably that this just suits my personal tastes. But if you doubt you patience and want a relatively quick result from a pulp fermented blackberry & elderberry wine then this works. I'm sure it's the elderberry that makes it a "grown up" wine. and the more you add the longer it takes to come right. so i think i may have hit a sweet spot here.

Blackberry Wine Facts

I've copied this from somewhere, probably a post on the dreaded facebook as I don't go near newspapers. There's links on the bottom incase you want to check facts or delve deeper.


"Compounds in blackberry wine were found to inhibit an enzyme involved in absorbing carbohydrates.
A drink made from berry wine could help diabetics cope with their condition, say researchers.
People with type 2 diabetes struggle to control their blood sugar levels as their bodies do not produce enough insulin. As a result they must be careful how many carbohydrate-rich foods they eat as the body turns them into glucose, making blood sugar levels rise. Blackberries contain a compound that can help stop blood sugar levels soaring

Now a study from the University of Illinois, has found that compounds found in both blueberry and blackberry wines inhibit two enzymes that are involved in the body's absorption of carbohydrates. The team said lab tests revealed a blueberry-blackberry blend of wine inhibited the carb-degrading enzymes, known as alpha-amylase and alpha-glucosidase, almost as much as an anti-diabetes drug. They now hope to create a non-alcoholic fermented fruit drink that keeps blood sugar levels low but also contains anti-inflammatory compounds found in the original wine.

In a second study, graduate Michelle Johnson measured the antioxidant, polyphenol, and anthocyanin levels in blueberry and blackberry wines. Her proposed blend contains an abundance of these bioactive compounds, which add to its healthful properties. The researchers are particularly interested in the ability of anthocyanins to reduce inflammation, which contributes to the development of many chronic illnesses, including cancer, metabolic disease, and cardiovascular disease. 

To that end, they are experimenting with the berries’ effects on inflammatory cells, and they have found that anthocyanins reduce markers associated with the inflammatory response. 'Preliminary studies have indicated that anthocyanins may have a positive effect on cognition and overall brain health while protecting against some of the effects of aging, such as Alzheimer’s disease and memory loss. These berries have some very intriguing components,' said Professor Elvira de Mejia. She added that the bioactive ingredients could also be added to any prepared beverage to give it colour, flavor, and nutritional punch, making them useful to the food industry.

-- Claire Bates"

more info on anthcyanins


Thursday, 9 August 2012

Recipe; Green Tea & Ginger 2012

First of all I have a confession to make. I forgot my camera, no piccies for this post, but don't despair i'll keep it brief and you can find other versions with piccies here, here and here.

Recipe; for 5 gallons

200g Green Tea (Bancha)
4 kg sugar
5 litres red grape juice
5 litres apple juice
3 Teaspoons Tartaric Acid
2 Teaspoons Citric Acid
5 Lemons (juice and zest)*
3 Limes (juice and zest)*
4 Teaspoons Pectolase
80 grams root ginger, peeled and chopped*
100g Crystallised ginger chopped*
Yeast nutrient (tronozymol)
3 Campden tablets (crushed)
Yeast, Ritchies Champagne.

OG; 1080

Method.

Put the tea leaves into a muslin bag (or two) and bring them to the boil in around a gallon of water. Decant the water into your fermenting bin. Add another gallon or so of water to the pan containing the bagged up tea. Bring to the boil and then tip the lot, including the bagged tea, into you fermenting bin.

Add the cartons of fruit juice, and also the sugar dissolved in a gallon or so of boiled water. Dissolve the acids, pectolase, crushed campden tablets and nutrient in water. Make up to 5 gallons with water. Stir well. Put a lid on it and leave overnight.

Next day stir the mixture very sloshily to get plenty of air into the liquid (use a whisk if you want) and check the gravity. If you want to be drinking this in a few months than keep the gravity around 1070-1080. mine came out at 1080. The yeast needs dissolved oxygen in the water to bud (multiply) so then add the yeast. I took a punt and used a packet that was almost 2 years beyond it's best before date. It was firing on all cylinders the next day. each day, for the next few days, stir the mixture sloshily and then cover it up again.

Around a week later transfer the wine to be into a secondary fermenting vessel fitted with an airlock. You don't need to be especially careful with this, but there's no need to add all the sludge. Then add the juice of the lemons and limes, and also citrus zests and ginger in a muslin bag together. I don't think i've left the addition of these ingredients so long before, but i think the result will be more of the lighter, floral flavours being captured.

When the fermentation stops then remove all the muslin bags (with contents), decant into demi-johns, degas, stabilise, fine etc as is your usual practice. You should be drinking a great homebrew in as little as 3 months, tho it will improve noticeably for a few months. If you make it stronger then it'll probably be quite unpleasant until it's had at least a year. If you have the patience to wait then go for it. it'll be great after a few years. If not then this is delicious easy drinking - especially with spicy food - very soon after starting it.

Tuesday, 12 June 2012

Recipe; Elderflower Blush Quickie 2012

This is the second 5 gallon batch of Elderflower wine I'm making this year. The first of this year's batches is here. I think I first made an Elderflower blush simply because I couldn't lay my hands on enough white grape juice when I went shopping (you can find that recipe here). It turned out to be a happy outcome. The colour is beautiful. So I'm making more. However this year I'm making it with a little difference, the timing worked out fine to start this batch on the lees of this year's Elderflower Quickie, the yeast still being viable.

Recipe for 5 Gallons

5 Litres Red Grape Juice (Rio D'Oro)
5 Litres Apple Juice (4 Vitafit, 1 Rio D'Oro)
3.5 Kg Sugar
5 Teaspoons Pectolase
5 Teaspoons Tartaric Acid
5 Teaspoons Nutrient (Tronozymol)
Yeast (Lees from previous brew, Gervin D, malic acid reducing)

OG 1079


and of course, heaps of elderflowers


Method

The method is pretty much exactly the same as for Elderflower Quickie 2012 so I'm not going to repeat the description. Just click the link and follow those instructions - with 2 exceptions! When I made the quickie brew I carefully decanted (poured) the wine into the secondary vessel when the primary fermentation was over. This left behind a little sediment, the lees, which contains live yeast. This is absolutely suitable for using again, and that's what I've done. So ...

1. Don't add crushed campden tablets, you'll stun the yeast and the fermentation may be tricky or slow to get started. Make sure to add the cold/cool ingredients to the fermenting bin first, if you add the hot dissolved sugar solution first then you'll kill the yeast in the fermentation bin.
2. Don't add any more yeast.

Discussion

If you're starting this brew from scratch then just follow the method instructions in Elderflower Quickie 2012 (but add crushed campden tablets and your choice of yeast) or the blush recipe and method from last year's wine.

You'll maybe also notice that the yeast nutrient is different. I ran out of the old one, and this new one came recommended. It smells much stronger, that B vitamin smell that you'll know well from marmite (or vegemite if you're from Australia). Don't worry tho, the yeast gobbles it all up and your wine won't taste like marmite.

Recipe; Elderflower Quickie 2012

Late spring and early summer always gets me excited because that means Elderflowers. Last year I made 10 gallons of Elderflower wine, in 2 batches. It wasn't too much, and it was - as usual - delicious. This is a wine that you really can't go wrong with. The good news is that it's not too late to get stuck into a brew. Tho don't hang around cos those delicious flowers won't be around much longer.

This recipe is pretty much a copy of last years, tho i couldn't get my hands on exactly the same brands. I don't think it'll make any difference.

Recipe, for 5 gallons;

5 Litres Apple juice (4 Vitafit, 1 Rio D'Oro, both from concentrate)
5 Litres White Grape Juice (Rio D'Oro, not from concentrate)
3.5 Kg Sugar
5 Teaspoons Pectolase
5 Teaspoons Tartaric Acid
2 Teaspoons Yeast Nutrient (Nutrivin)
3 Campden Tablets, crushed.
Yeast - Gervin D (malic acid reducing).

OG 1079


And loads of elderflowers in 2 muslin bags (probably around 3 litres)


Method

If you're a regular reader then you'll know the drill. If not then follow the links to brews from previous years and you'll find more detail there.

Dissolve the sugar in a pan of water while heating it up. Meanwhile pour all the juices into your fermenting bin. Add all the other ingredients (except the yeast and the elderflowers). Rinse out the juice cartons with water and add rinsings to the fermenting bin too. Add the sugar solution and then make the volume up to 5 gallons. Now stir the mixture sloshily for a few minutes so that you get plenty of air into it. I use a whisk. The yeast will need this to multiply, form a healthy colony and get your fermentation underway at a good pace.

You should have an OG around 1070-1080. Don't aim any higher cos you want to drink this soon, like 6-8 weeks. If you try to make it strong then it won't be a pleasure to drink in this short time frame. Put the lid on the fermenting bin and leave it overnight. Next day do the sloshy stir again, and then add the yeast. Cover. Each day for the next few days, stir sloshily.

After a few days you'll be wanting to think about those elderflowers. Keep an eye on the weather forecast, you want a dry sunny day ideally. Make sure you smell the flowers, the good ones smell divine, the ones you don't want smell like cat's pee. Not all elderflower trees are equal! Collect enough sprays to fill about 1 - 2 carrier bags. No need to pack them in, just drop them in. This will be plenty. Trust me, when you add the flowers late into the fermentation then the flavour is extracted much better due to the alcohol content. The fermentation will also have tailed off so those wonderful aromas won't get blown away by escaping gasses.

Put your flowers into one or more plastic bags (depending on their size). Tie the top up. Leave it overnight or for 24 hours. Then shake it for a few minutes. The flowers will all drop off the sprays, along with the pollen from them (looks like yellow/orange dust or sand). Remove the stalks/sprays and bag the flowers into 2 muslin or nylon mesh bags.

Your fermentation should have been going for a few days to a week, if it's a little longer it won't matter, as long as it still fermenting all will be fine. Mine was going for 9 days before I added the flowers. Decant or siphon the wine into a secondary fermenter fitted with an airlock and then add the flowers. When the fermentation stops remove the flowers and rack off the sediment. Degas, stabilise and leave the wine to clear under airlocks. Rack again once it's clear and it won't be long 'til your sipping delicious elderflower wine around 11% ABV.

Discussion

If you don't have a big airlocked fermentation vessel then you'll have to add the flowers at the start of fermentation, and remove them when you move the wine into 1 gallon demi-johns for their secondary fermentation. This will still result in a good wine, and it'll still be ready to drink after 6-8 weeks. The only down-side is that you'll need more flowers to achieve the same level of flavour. At least a litre per gallon of wine. But give it a go with what you can find, this is delicious wine. Whether the elderflower flavour is strong or subtle (or anywhere inbetween) I'm sure you'll be delighted with it, and so will your mates.


Thursday, 22 March 2012

Bottling

Sometimes I forget to write a bit about the basics that go on, or updates. I do quite well with writing about starting new brews tho. Tonight I bottled some wine, and enjoyed it, and at daft o'clock I'm still awake. It's been a busy day, and there's more to do but I'm tired now. So I'll just blog instead.

All the brewing activity started because I'll soon be away for a little while doing a workshop. So I checked what needed brewing attention. 5 gallons of the Cranberry & Blueberry wine need racking into DJ's. But there are not 5 empty DJ's. So that means I have to bottle wine. After some 30 minutes of poking around the assorted 30 full vessels, and consulting my better half, the decision was made. I was going to bottle a gallon of Rose Petal, a gallon of Green Tea & Ginger and a gallon of Ginger & Lemongrass.

And so I did, and for each gallon I bottled I got to drink a glass. So it's a good night. The wines are all excellent. Sometimes this is a problem, if they are all good then you want to make them all again. If this keeps on happening then you have a lot of variety to work into your routine. And if you want to keep on experimenting then you just have to brew more. You see how this can quickly become an obsessive and crazy kind of thing!

There's something else I'm enjoying about the flavours from the evening, and memories of food it's gone with. The Green Tea & Ginger goes so well with a curry, the Ginger & Lemongrass goes a treat with something like Thai Green Curry. So I wonder if a Rose Petal wine goes well with Turkish and middle eastern food?

None of these wines take an age to become good drinking. At most a year and in the case of the Ginger & Lemongrass only about 6-8 weeks. So what are you waiting for? Me ... I still have more brewing stuff to do tomorrow .... racking, degassing and stabilising.

Enough of my ramblings. Cheers.

Monday, 5 March 2012

Recipe Blueberry & Cranberry Quickie

One of my better half's favourite quickie wines is Blueberry & Cranberry. I made heaps of it in 2010, and basically this is an attempt to make another one. So here's an old post for how I've done it before, because I couldn't find the same ingredients this time around.

Ingredients; 5 Gallons

5 Litres Red Grape Juice
2 Litres Blueberry Juice Drink
3 Litres Cranberry Juice Drink
3.33 Kg Sugar
Yeast Nutrient
4 Teaspoons Pectolase
3 Teaspoons Tartaric Acid
2 Teaspoons Citric Acid
Water to 5 gallons
Yeast; Gervin D (GV D)

OG 1078
The blueberry and cranberry juice drinks that I used were just the best I could get. So the highest fruit content, but always watered down. They were also all natural ingredients, no preservatives. But they were blends of various fruit juices. So the named fruit is the dominant one.

Method

Dissolve sugar in about 1 gallon of boiling water. Put all ingredients apart from yeast into a fermenting bin. Stir must well to mix. Measure gravity to ensure it's in the range you want, adjust if necessary. Check temperature is on the right range for your yeast, it'll be written on the packet of yeast. Adjust if necessary. Stir very sloshily to get plenty of air dissolved in the must. Then add yeast and cover.

Each day, for the next few days, stir sloshily for a couple or 3 minutes and then cover again. After about a week transfer to secondary fermenters under airlocks. When it stops fermenting then rack, degas and stabilise. Fine if required (but shouldn't be).

Discussion;

This wine will be ready to drink 6-8 weeks from starting. It will be around 11% ABV.
The result will be a table wine, well balanced. A light, crisp, rosé with a clean edge. Something you would be happy to pay around £5 a bottle for if you bought it in a supermarket. Not bad for a few 10's of pence per bottle!

Update 12th June 2012;

This has turned out to be a fine table wine, just as good as the version I was trying to replicate. So i'm now quite happy that blueberry and cranberry quickie can be done in more than one way. Go ahead and give it a go with the juices that are available near you, no need to find ocean spray which may be a relief to those of you who get into the politics of food!
 

Counters
Lamps Plus Lighting